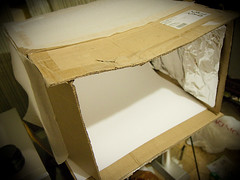
What if you don't have something that you need? Well then either you could buy it or you could make it yourself. A few months ago, I was about to list my lens to sell it on ebay and needed to get several snaps of it for the ads. I could simply go out and buy a $80 lightbox but then again I thought I would rather spend it on something else so it is the MIY (make it yourself) solution. One would ask why would you need a lightbox in the first place. Well as we all know that if we could make it as attractive as possible. then the item would sell at a higher price That is why you see people use decorations in shops and all sort of other elements to attract buyers. Well it's the same case here, by using a lightbox you are basically creating a nicer lighting and cleaner background larger. The lightings are improved when the lightbox is used when compared to using a bare bulb as the larger diffusion materials creates a larger lightsource which in turns softens the light (see strobist.blogspot.com to know more about lightings). To put it simple, basically I am trying to imitate the how the PROS shoot their products for ads. To create the lightbox, I need to find a frame which can hold my diffusion materials, so basically searched and found an unused box which I could use as a frame to attach my diffusion materials, then I started cutting a few of the sides off. Then, I went to the kitchen to find baking paper to be used for diffusion materials. The baking paper were glued to the sides of the box. As I've got only two lights at that time, I covered one side using aluminium foil with the intention of it acting as a reflector. Furthermore, I went and bought a $1.50 white cardboard to be used as my backdrop. My finished lightbox is shown above. I know it is not pretty, but then again it'll do the job, :).
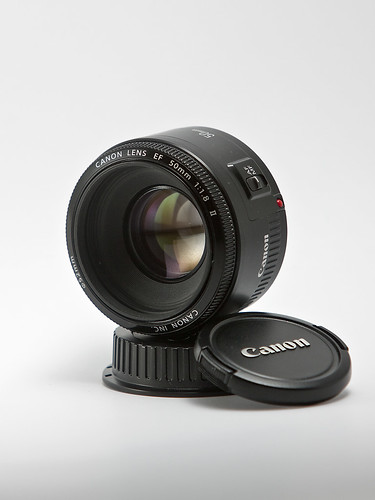
As for the lens shot for the ebay ads, I first tried to position the lens in way that it looked decent, by placing the front lid on the side at an angle to create an extra dimension on the shot. Furthermore, I also had the the back lid of the lens used as a mount to hold the lens in it's place. I used two lights for this shot, one placed above and the other from the left-side of the camera. I then positioned the left light in such a way that I could get some reflections off the lens' front element. All the lights were triggered using my RF-602 (which is a cheap ebay trigger - you could use continuous lights anyway such as desk lamps). I used my speedlites so I can dial the power to balance it up but if you were using desk lamps then basically moving it away from the diffusion panel would lower the power and vice versa. The quality of light would not change because the distance of the the diffusion panel with respect to the object has not change. In wrapping it up, I'd just wanted to mention that you can always try to create things using what is available to you. Happy snapping guys!
Sweet idea bro!
ReplyDeleteThx Jp!
ReplyDelete